

Furniture often reaches a new home as separate rails, legs, shelves, drawers, and hardware bags. An item can look nearly complete while a missing fastener or loose joint makes it unsafe to use. Reassembly is more than getting the pieces together: identify the right parts, follow the maker's instructions, check stability, and keep a clear record of anything that arrived damaged or incomplete.
Choose the pieces that enable the home to function first. Beds, a work desk, and essential seating may matter before a decorative cabinet. The guide to unpacking by priority without losing track can help keep hardware, tools, and cartons associated with each item while other unpacking continues. Do not open every hardware bag at once. Lay out one furniture item in a clear work area, finish its checks, then move to the next.
Begin with the manual or the manufacturer's current instructions for the exact model. Furniture that looks similar can use different fasteners, brackets, or load limits. If the manual was packed, find its labeled pouch or an official copy from the maker. Do not substitute an online video for instructions when the model is uncertain. If the household hired a mover or assembler, clarify who is responsible for reassembly and what will be checked before the service is considered complete.
Make a safe work area
Clear enough floor space to lay parts down without blocking doors, stairs, vents, or walkways. Put a clean blanket or cardboard under surfaces that could scratch the floor, but ensure it will not slide under a person carrying weight. Keep children and pets away from loose fasteners, power tools, unstable panels, and partially built pieces. Store sharp tools where they cannot be stepped on between work sessions.
Check the light and the floor. A dark corner makes it easy to miss a small crack or put a bolt into the wrong hole. An uneven or soft surface can make a frame appear square when it is not. Work on the floor or a stable workbench, depending on the item and instructions. Do not balance a large panel against a wall where it can fall while you search for hardware.
Plan for the item's weight and shape. A tall bookcase or bed frame may need two adults to hold parts in alignment. If the manual specifies a second person, arrange one. Do not use a child as the helper for a heavy lift. If the item is too large for the household to handle without strain or loss of control, schedule qualified help rather than forcing completion because a room is full of boxes.
Keep hardware in a shallow tray or labeled container. Pair each bag with its parent item and photograph the contents before opening if the original labeling is unclear. A pile of nearly identical screws from several products is a common source of assembly errors. Match length, thread, head, and quantity to the instructions. Do not assume a spare-looking screw belongs somewhere because the count is off; some kits contain extras.
Inspect parts before tightening anything
Lay out the main panels, rails, legs, shelves, brackets, and small parts against the parts list. Look for damage at connection points: split wood near an insert, stripped threads, bent metal, cracked plastic, or a missing fitting. A superficial scuff may not affect strength, while a damaged joint can. Photograph a concern before assembly hides it and note whether it was visible at delivery or discovered while unwrapping.
If a part is missing, stop at a stable stage. Do not replace a structural fastener with a random one from a household jar. Different length or thread can fail to engage, protrude through a finished surface, or damage an insert. Contact the manufacturer, seller, mover, or assembler as appropriate to identify the part and the next step. Keep the item out of service until it can be completed safely.
Check whether a piece was assembled differently before the move. A bed may have been disassembled by the mover, while a shelf was disassembled by the household. The person who removed the hardware may know where a pouch was placed. Ask before filing a missing-piece report. Keep photos from the origin if they show the original configuration, but use the manufacturer's instructions for the actual assembly sequence.
Do not hide damage by putting a cracked side against the wall or a weak leg at the back. Document the condition and decide whether the component should be repaired or replaced. If a moving claim may be involved, preserve the packaging and photographs. Assembly should not make an unsafe piece appear usable or erase the evidence of a delivery problem.
Build in the prescribed sequence
Follow the order in the instructions. Many pieces need bolts started loosely so the frame can align before final tightening. Tightening one corner completely too early can twist the frame or strip a fitting when the last hole does not line up. Hand-start fasteners to confirm the threads engage correctly. Use the recommended tool and torque guidance when provided; do not use a power driver on a delicate insert simply to save minutes.
Keep left and right parts distinct. Drawer slides, bed rails, and hinges can look symmetrical until they are mounted. Check orientation against the diagram before fastening. If a panel must be turned over, clear the area and ask another adult to help rather than dragging a finished edge across the floor. Protect glass and mirrors according to their product instructions and keep them out of the main carrying route.
If a connection resists, stop and find the reason. A crossed thread, reversed bracket, or hidden shipping spacer is easier to fix before a bolt is forced. Do not enlarge a hole, cut a bracket, or omit a fastener without the maker's direction. An improvised fix may damage the piece and change its load capacity. Record what prevented assembly if you need to ask for a replacement part or professional help.
As each stage finishes, check that parts sit flush and the frame is square where expected. A drawer should travel smoothly; a shelf should seat on all supports; a bed slat should rest in its designed position. Test gently before loading. Do not put a mattress, books, or a television on a piece just because the visible panels are attached. Complete the stability and anchoring steps first.
Anchor furniture that can tip
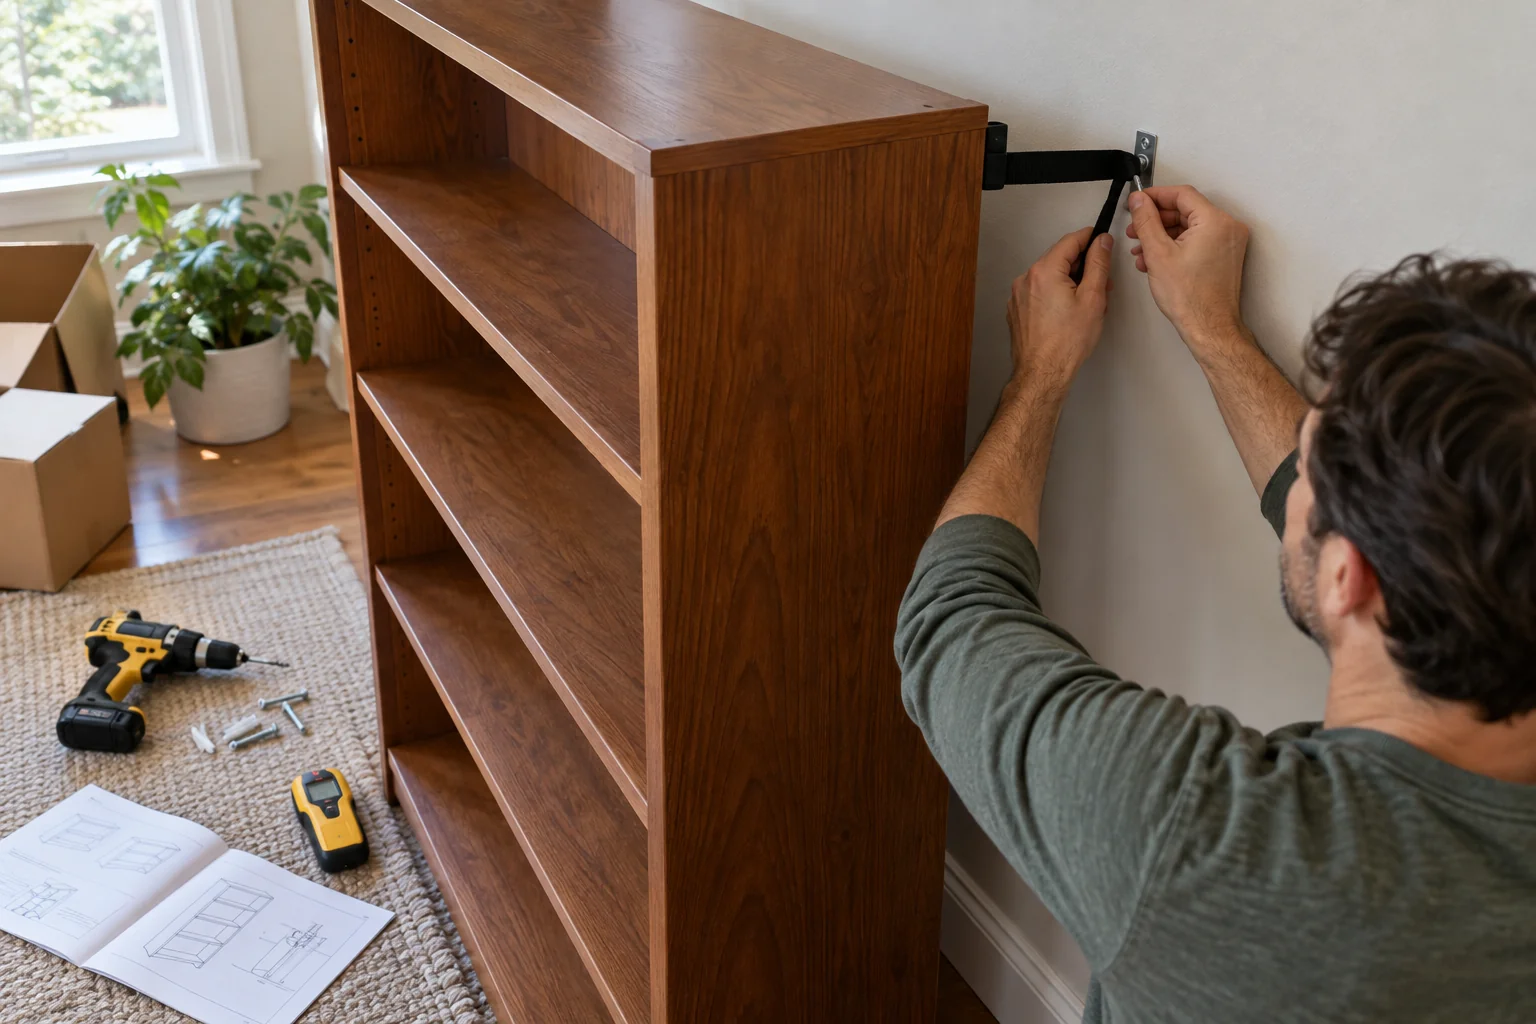
Tall or top-heavy furniture needs particular care. The U.S. Consumer Product Safety Commission's Anchor It guidance says to secure furniture and televisions properly, follow manufacturer instructions, and use appropriate anti-tip devices. The concern is especially acute where children may climb, but anchoring is a sensible part of setting up a stable room generally. A newly moved dresser is not finished just because its drawers slide.
Use the anchor specified or approved for the item and appropriate for the wall construction. A fastener suitable for one wall may not be suitable for another. Locate a sound attachment point and follow the manufacturer's directions. If the household cannot identify the wall construction or is not permitted to drill, ask the property owner and a qualified installer about a compliant solution. Do not attach a strap only to thin drywall and assume it will hold.
Keep heavy items low, avoid loading an unanchored unit, and do not place toys or remotes on top where a child may be tempted to climb. A television needs a stand or mount intended for its size and weight, plus any recommended restraint. Do not treat a stack of moving boxes behind a shelf as temporary support. It can shift as unpacking proceeds.
Check anchors after the furniture is in its final position. Moving a unit several inches to reach an outlet may loosen or misalign a strap. Mark the anchoring task as complete only after it is attached and inspected. If you move the unit again later, inspect and restore the restraint before use. Keep the hardware instructions with the household's product records for future moves.
Check function before normal use
Test a bed with gradual weight after all rails, slats, and supports are installed. Listen or look for shifting, gaps, and uneven legs. Check that the mattress is supported as the manufacturer intends and that the frame does not obstruct a door or heater. A bed that rocks may need adjustment, a missing support, or a better location; do not ignore it because the first night is approaching.
For a table, press lightly at each corner and verify that legs sit firmly. Extend leaves only after their locks or supports are installed. For a desk, open drawers one at a time and check that cable routes and power strips will not be pinched. For shelving, test each shelf support and then load gradually within the maker's limit. Heavy contents belong lower to improve stability, but that does not replace anchoring.
Check doors and drawers for proper travel and clearance. A dresser may be stable when all drawers are shut yet tip or twist when several are opened. Do not use it until all intended restraint and leveling steps are complete. A cabinet door that rubs may signal a frame out of square. Adjust according to the manual rather than forcing a hinge and cracking the panel.
For upholstered furniture, check that detachable legs, connectors, or recliner components are secured. A sofa section that simply sits next to another can separate when someone leans on it. Electrical recliners or adjustable beds add wiring concerns: inspect cords for damage, keep them out of pinch points, and use the manufacturer's setup instructions. If wiring or a power component is damaged, stop and seek qualified service rather than testing it repeatedly.
Keep the service and condition record clear
If the mover or an assembly contractor performs the work, walk through each completed item before they leave. Check that all parts and packaging are accounted for and that the item operates as expected. Ask what the service includes: anchoring, leveling, connecting electronics, or removing packing may be separate. Do not mark an incomplete item “assembled” because the crew has put the main frame together.
Record exceptions precisely. “Bed frame assembled; center support missing; not safe for use” tells the provider what must be resolved. “Bookshelf has new split at lower left fastener; photographed before assembly” gives a clear condition record. Keep the signed work order, photographs, part list, and messages together. If a problem relates to transport, connect it to the item's inventory tag and delivery record.
If the household assembles the piece, note the date, missing parts, and any concern found. This is not an engineering certificate. It is a practical way to avoid forgetting which of several shelves still needs a wall anchor or which bed requires a replacement bolt. Put open items on the household task board with an owner and date, and keep the furniture out of use where necessary.
Retain the manual and spare hardware in a labeled bag attached to, or stored with, the item. Do not tape a bag where it will interfere with a moving part or heat source. A future move or repair will be easier if the fasteners remain identifiable. Photograph the final assembly if it helps show the configuration for later disassembly.
Keep the furniture task separate from closing the former home. It is easy to spend the afternoon building a bed at the destination while a lamp, tool case, or disassembly hardware remains plugged in or stored at the old address. Before ending access there, confirm that all item parts and tools have been collected and that the old account handoff has an owner. The guide to closing old service and utility accounts covers the final readings and confirmations that should not be lost amid assembly work at the new place.
When an item must be reassembled in a rental, confirm what the lease or property manager allows before drilling or mounting. A permitted anchor still needs to suit the wall and the furniture. If permission is uncertain, keep the unit empty and inaccessible to children while you resolve it; a promise to anchor it later is not a safety measure. Document the approved installation so the household knows how to remove or repair it at the next move.
Set a final inspection date for items that will be loaded gradually. A newly assembled shelf may look stable empty, then reveal an uneven foot after books are added. A bed may need a second check after the first night. Reinspect fasteners and alignment according to the maker's guidance, especially after moving the item across the room. If a connection loosens repeatedly, stop using the item and investigate rather than tightening it again without understanding why.
A first-week example
Suppose a household has two beds, a tall bookcase, a desk, and a dining table in pieces. On move day, the adults set up the children's bed first, using its labeled hardware bag and manual. They check the frame and make the sleeping area usable. They leave the tall bookcase empty because the wall anchor has not been installed. The dining table can wait until the next day; a small folding surface handles dinner.
The next morning, they lay out the desk parts. One rail has a split near a threaded insert. They photograph it, compare it with the pickup image, and set it aside. They do not force the screw into the split. They contact the provider responsible for the piece and use a temporary work surface. The task board says “desk rail replacement or repair,” not “office done.”
Later, an installer anchors the bookcase according to its instructions and the wall type. The household checks the restraint, then loads heavy books on lower shelves. The adults assemble the table with two people, test its legs and leaf support, and keep spare fasteners in a labeled bag. Each item moves from parts to inspected, usable furniture; the damaged desk remains an explicit exception rather than an unstable workaround.
Finish each item deliberately
Before declaring a piece complete, confirm four things: all required parts are present, the connections are correctly installed, the item works under normal light use, and any required restraint is in place. Then clear tools and packaging from the room. Do not leave loose screws where a child or pet can find them. Photograph and document any unresolved concern before the work area disappears under other unpacking.
Furniture setup is complete only when the household can use the item safely. If a missing part, uncertain wall attachment, or damaged connection prevents that, keep the item unloaded or out of service and give the repair a named owner. A home can be comfortable with a few pieces still waiting; it should not depend on furniture that merely looks assembled.
Write down which pieces are safe to use now and which are waiting for a part, installation, or inspection. Tell everyone in the household, including guests who might pull out a chair or open a drawer. A clear temporary boundary prevents an unfinished project from becoming an accidental everyday object.
Verify the piece before normal use
After a bed or shelving unit is reassembled, compare it with the hardware and instructions available. Check that fasteners are present, panels sit square, and the unit does not rock under a light, appropriate test. Anchor furniture where required by its instructions and the household's safety needs. Do not use an item that is unstable or visibly damaged while waiting for a replacement part. Photograph a missing fastener or cracked component, label the bag of remaining hardware, and note who will contact the installer or manufacturer. A signed assembly checklist is not a substitute for a safe, usable piece.